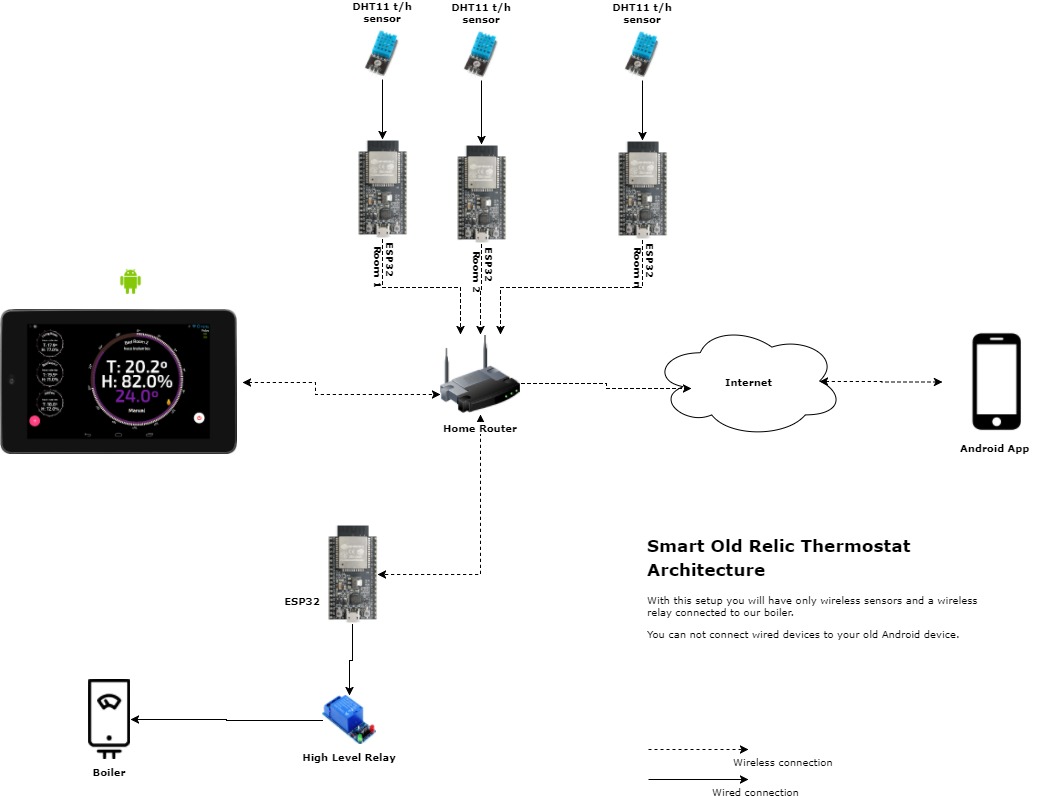
Overview of the Wifi Smart Thermostat architecture
This Wifi Smart Thermostat DIY project pretends to be flexible enough to adapt itself to the most used configurations and budgets.
The Thermostat app
All you need is an old smartphone or tablet with Android 4.4+. Our Android app installed on this device will play the “Thermostat” role.
The main thing to take into account is that you can’t connect sensors directly to a smartphone or tablet, and all the sensors will be wireless sensors, controlled by ESP32 mcu’s. The android device will communicate with the ESP32 mcu’s, and play the role as a thermostat.
The nodes.
For each node, we use one ESP32 MCU. A node can be
- a temperature/humidity node: the role of this node is to register the temperatures in a room and report them to the thermostat. For this type of node, you will need one ESP32 and one temperature sensor. You can have as many temperature nodes as you want.
- a relay node: the role of this node is to turn your boiler on and off. There may be only one relay node per thermostat. You will need an ESP32, and a High Level Triggered relay.
- an hybrid node: you can have both, the relay and the temperature sensor connected to the same ESP32, which will assume both roles: report the temperatures and turn the boiler off and on. Important is the fact that you can have only one relay per thermostat.
The Client App
The Client App will be the most common way to control the thermostat, especially when you are not at home. Many users can share access to the same thermostat (for example, the members of a family).